Britax ClickTight Marathon Manual: A Comprehensive Guide (Updated 12/04/2025)
Welcome! This comprehensive guide, updated today – 12/04/2025 – details the Britax ClickTight Marathon, featuring an exceptionally easy installation system and addressing recent safety recalls.
Congratulations on choosing the Britax ClickTight Marathon convertible car seat! This model represents a significant advancement in child passenger safety, primarily due to its innovative ClickTight Installation System. This system dramatically simplifies the installation process, eliminating common frustrations like kneeling and struggling to achieve a secure fit.
The Britax Marathon is designed to accommodate children from infancy through the toddler years, offering a comfortable and safe ride as they grow. It’s built with high-quality materials and rigorously tested to meet or exceed safety standards. However, it’s crucial to be aware of past safety recalls – specifically, those affecting Advocate, Boulevard, and Marathon ClickTight models manufactured between August 2014 and July 2015, concerning potential harness locking issues.
This manual will guide you through every aspect of the car seat, from installation and adjustment to maintenance and troubleshooting, ensuring your child’s safety and your peace of mind.
Understanding the ClickTight Installation System
The ClickTight Installation System is the cornerstone of the Britax Marathon’s ease of use and secure installation. Unlike traditional car seat installations that often require significant force and maneuvering, ClickTight allows for a remarkably simple and intuitive process. It eliminates the need to kneel inside the vehicle or struggle with tightening the seat belt.

Here’s how it works: you simply open the ClickTight compartment, route the vehicle’s seat belt through the designated path, and then close the compartment. The system then automatically locks the belt, creating an exceptionally tight and secure fit. This innovative design minimizes installation errors and ensures the car seat remains firmly in place.
Britax has set a high standard with this technology, making it a preferred choice for parents seeking a hassle-free and reliable installation method.
Key Features and Benefits
The Britax ClickTight Marathon boasts a wealth of features designed for both safety and convenience. Beyond the revolutionary ClickTight Installation System, this car seat offers superior side-impact protection, safeguarding your child during a collision. It’s engineered with energy-absorbing foam and steel frames, providing robust structural integrity.
Key benefits include a no-rethread harness, simplifying adjustments as your child grows, and multiple recline positions for optimal comfort. The Marathon is designed to accommodate children from newborns up to substantial weights and heights, offering extended use.
Furthermore, Britax prioritizes safety with features like a front-adjust recline and easy-to-clean fabrics. This combination of safety innovations and user-friendly design makes the ClickTight Marathon a standout choice for discerning parents.

Installation Guide
Secure installation is paramount! This section provides detailed instructions for utilizing the ClickTight system, LATCH, or vehicle seat belt for a safe and stable fit.
Step-by-Step ClickTight Installation Process
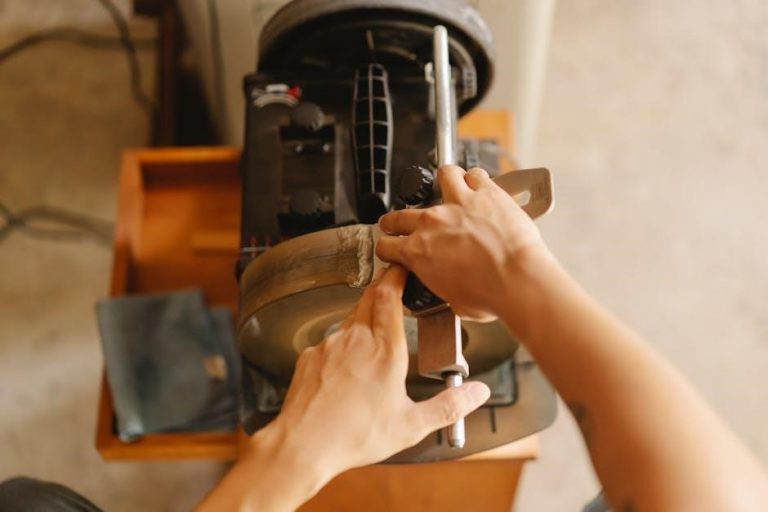
Effortless installation awaits! Begin by positioning the car seat in the vehicle. Open the ClickTight compartment, located near the belt path. Route the vehicle’s seat belt through the designated path. Crucially, do not buckle the seat belt yet. Close the ClickTight compartment door. Now, firmly pull the strap – you’ll feel the seat tighten significantly.
Repeat this tightening process several times, ensuring a remarkably snug fit. This eliminates the common struggles of kneeling and rocking. Finally, buckle the vehicle seat belt. Confirm a secure installation by attempting to move the car seat side-to-side and front-to-back; movement should be minimal – less than one inch; Remember, a properly installed car seat is a safe car seat!
Using the LATCH System
LATCH (Lower Anchors and Tethers for Children) provides an alternative installation method. Locate the vehicle’s lower anchors – typically found in the seat bight. Connect the car seat’s lower anchor connectors to these vehicle anchors, ensuring a secure click. Always verify the connection by pulling firmly on the car seat.
Additionally, utilize the tether strap. Locate the vehicle’s tether anchor – consult your vehicle manual for its location. Attach the tether strap to this anchor and tighten it. The tether significantly reduces forward movement in a crash. Remember, while LATCH is convenient, the ClickTight system often provides a superior installation. Always prioritize the most secure method available for your vehicle.
Using the Vehicle Seat Belt
Vehicle seat belt installation offers a reliable alternative to the LATCH system; Route the vehicle’s seat belt through the designated belt path on the car seat, as illustrated in the manual. Ensure the belt lies flat and isn’t twisted. To achieve a tight fit, utilize the ClickTight Installation System – open the ClickTight panel, route the belt, and close the panel, locking the belt in place.
Pull the shoulder belt to remove any slack. Confirm a secure installation by attempting to move the car seat side-to-side and front-to-back; movement should be minimal (less than one inch). Remember, proper installation is crucial for safety. Always consult your vehicle’s manual for specific seat belt instructions.
Proper Recline Angle Adjustment
Achieving the correct recline angle is vital for your child’s comfort and safety, especially for infants. The Britax ClickTight Marathon features adjustable recline positions. Refer to the indicator label on the car seat to ensure the appropriate angle is selected based on your child’s age and weight.
Typically, a more reclined position is necessary for newborns to maintain a safe airway. As your child grows, you can adjust to a more upright position. To adjust, locate the recline mechanism – usually a handle or lever – and follow the instructions in the manual. Always double-check the angle after adjustment to confirm it’s correct before each journey.
Checking Installation Security
Rigorous verification of your Britax ClickTight Marathon’s installation is paramount for your child’s safety. After utilizing the ClickTight system or LATCH/seat belt installation, perform the “inch test.” Firmly grasp the car seat near the belt path and attempt to move it side-to-side and front-to-back.
Movement exceeding one inch indicates a loose installation requiring readjustment. Ensure the belt path is correctly positioned and the ClickTight mechanism is fully engaged. Regularly check the installation, especially after vehicle use or if the car seat has been disturbed. A secure installation minimizes risk during a collision, providing optimal protection for your little one.
Harness and Adjustment System
Proper harness use is crucial for safety. This section details adjusting the harness height, buckling/unbuckling, chest clip positioning, and tightening/loosening procedures for optimal fit.
Adjusting the Harness Height
Ensuring a proper harness fit is paramount for your child’s safety within the Britax ClickTight Marathon. The harness height should always be adjusted to, or just above, your child’s shoulders when used in rear-facing mode. As your child grows, the harness must be raised to maintain this correct positioning.
To adjust the harness height, locate the harness adjustment straps at the top of the car seat. Typically, these are red in color for easy identification. Simply loosen the harness straps by pressing the red release button, then slide the harness straps up or down to the appropriate height.
Re-thread the harness straps through the correct slots in the car seat shell. Once adjusted, firmly tighten the harness to ensure a snug and secure fit. Always double-check that the harness straps are level with your child’s shoulders before each journey. Incorrect harness height can compromise the car seat’s protective capabilities during a collision.
Buckling and Unbuckling the Harness
Securing your child in the Britax ClickTight Marathon is straightforward, but crucial for safety. To buckle the harness, firmly push the two harness connectors into the red buckle until you hear a distinct ‘click’. Ensure both connectors are securely locked; a visual indicator on the buckle will confirm this.
Unbuckling the harness is equally simple. Locate the red release button on the buckle and press it firmly. This will release both harness connectors simultaneously, allowing you to easily remove your child from the car seat. Always check that the harness is completely unbuckled before attempting to lift your child out.
Never allow your child to operate the buckle themselves. Regularly inspect the buckle for any damage or malfunction. A properly functioning buckle is essential for the car seat’s protective performance.
Chest Clip Positioning
Proper chest clip placement is vital for optimizing your child’s safety within the Britax ClickTight Marathon. The chest clip should always be positioned at armpit level. This ensures the harness straps are correctly positioned over your child’s shoulders, distributing crash forces effectively.
Adjusting the clip is easy – simply slide it up or down the harness straps to achieve the correct height; Never place the chest clip below armpit level, as this could compromise the car seat’s performance in a collision. Maintaining this correct position helps prevent submarining, where a child slides under the harness.
Regularly check the chest clip’s position, especially as your child grows. Ensure it remains at armpit level with each use. A correctly positioned chest clip contributes significantly to the overall safety and effectiveness of the car seat.
Harness Tightening and Loosening
Securing your child correctly involves mastering the Britax ClickTight Marathon’s harness system. To tighten, pull the harness straps at the shoulder area. You should aim for a snug fit – no more than one finger’s width of space between the harness and your child’s collarbone. A secure harness minimizes forward movement during sudden stops or collisions.

Loosening the harness is equally important for comfort, especially as your child’s clothing changes. Locate the release button near the buckle; pressing it while simultaneously pulling on the shoulder straps will loosen the harness. Always re-tighten after adjusting for clothing.
Regularly check the harness tightness to ensure it remains secure throughout your journey. A properly adjusted harness is crucial for maximizing the car seat’s protective capabilities.

Safety Recalls & Important Notices
Critical safety information: Britax recalled specific Advocate, Boulevard, and Marathon ClickTight models (Aug 2014 ⏤ July 2015) due to potential harness locking defects.

Britax Recall: Advocate, Boulevard & Marathon ClickTight (Aug 2014 ⏤ July 2015)
Important Recall Notice: Britax has issued a recall affecting 37 models of their car seats, specifically the Advocate ClickTight, Boulevard ClickTight, and Marathon ClickTight convertible car seats. This recall pertains to seats manufactured between August 1, 2014, and July 29, 2015. The potential safety defect involves the harnesses potentially failing to lock, which could compromise the safety of a child during a collision.
Britax has determined that only seats within this specific manufacturing date range are affected. If you own one of these models, it is crucial to determine the manufacture date of your car seat. Owners are urged to immediately stop using the car seat until the remedy has been applied. Contact Britax customer service to determine eligibility and arrange for a free repair. Further details and instructions can be found on the Britax website and through the National Highway Traffic Safety Administration (NHTSA).
Checking Your Car Seat’s Manufacture Date
Locating the Manufacture Date: Determining your Britax ClickTight Marathon’s manufacture date is vital, especially concerning the August 2014 – July 2015 recall. The date is typically found on a label affixed to the car seat itself. This label is usually located on the underside of the seat, on the rear, or along the side.
Look for a white label with molded-in text; it won’t be a printed sticker. The date is presented in a specific format – often a code indicating the month, day, and year. Carefully examine the label for this information. If you are unsure how to interpret the code, refer to the Britax website or contact their customer service for assistance. Knowing your car seat’s manufacture date is the first step in ensuring your child’s safety and determining if your seat is subject to the recall.
Registering Your Car Seat
Importance of Registration: Registering your Britax ClickTight Marathon car seat is a crucial step for receiving vital safety information and recall notices directly from Britax. Registration ensures you’ll be promptly informed of any potential issues affecting your specific model, like the recall impacting seats manufactured between August 1, 2014, and July 29, 2015.
You can easily register your car seat online through the official Britax website. The process typically requires providing the model name, manufacture date (as previously determined), and your contact information. Registering is free and takes only a few minutes. By registering, you actively participate in ensuring your child’s safety and demonstrate your commitment to responsible car seat usage. Don’t delay – register your Britax ClickTight Marathon today!

Maintenance and Care
Regular upkeep is vital for longevity and safety. Inspect for wear, clean the cover, replace damaged parts, and follow proper storage guidelines for your Britax seat.
Cleaning the Car Seat Cover
Maintaining a clean car seat is essential for hygiene and comfort. The Britax ClickTight Marathon cover is removable and machine washable, offering convenient cleaning. Always detach the cover carefully, following the instructions in the manual to avoid damaging any straps or buckles.
Use a mild detergent and cold water on a gentle cycle. Avoid bleach or harsh chemicals, as these can compromise the fabric’s integrity and potentially affect the car seat’s safety features. After washing, air dry the cover completely. Do not place it in a dryer, as heat can cause shrinkage or damage.
Before re-installing, ensure the cover is thoroughly dry. Inspect it for any signs of wear and tear. Spot cleaning with a damp cloth and mild soap is suitable for minor spills and stains. Remember to always refer to the complete Britax ClickTight Marathon manual for detailed cleaning instructions specific to your model.
Inspecting for Wear and Tear
Regular inspection of your Britax ClickTight Marathon is crucial for ensuring continued safety; Periodically examine the harness straps for fraying, cuts, or abrasions. Check the buckle for proper function – it should securely latch and release. Inspect the shell of the car seat for any cracks or damage, particularly after an accident.
Pay close attention to the ClickTight installation system; ensure it remains functional and isn’t showing signs of stress. Examine the LATCH connectors and vehicle belt paths for wear. If any damage is detected, discontinue use immediately and contact Britax customer support.
Remember, even seemingly minor wear can compromise the car seat’s protective capabilities. Consistent, thorough inspections, alongside proper cleaning, contribute significantly to the longevity and safety of your Britax ClickTight Marathon. Always consult the full manual for detailed inspection guidelines.
Replacing Damaged Parts
Do not attempt to repair any damaged components of your Britax ClickTight Marathon car seat yourself. Only Britax-approved replacement parts should be used to maintain safety standards. Contact Britax customer support or visit their website to order the correct replacement parts for your specific model and manufacture date.
Commonly replaced parts include harness straps, buckles, chest clips, and potentially components of the ClickTight installation system if damaged. Incorrectly installed or non-approved parts can severely compromise the car seat’s protective function in a crash.
Britax provides detailed instructions for replacing parts; carefully follow these guidelines. If you are unsure about any step, seek assistance from a certified Child Passenger Safety Technician (CPST). Prioritize safety – a properly maintained car seat is paramount for your child’s well-being.
Storage Guidelines
Proper storage is crucial for maintaining your Britax ClickTight Marathon car seat’s longevity and functionality. When not in use, store the car seat in a clean, dry environment, away from direct sunlight and extreme temperatures. Avoid storing it in damp basements or hot attics, as this can degrade the materials.
Protect the car seat from dust and debris by covering it with a breathable sheet or large plastic bag. Ensure adequate ventilation to prevent mildew growth; Do not store heavy objects on top of the car seat, as this could damage the frame or harness system.
Regularly inspect the car seat before and after storage to identify any potential issues. Following these guidelines will help ensure your Britax ClickTight Marathon remains safe and reliable for years to come.

Troubleshooting Common Issues
Facing difficulties? This section addresses common problems like harness tightening issues, ClickTight mechanism failures, and recline adjustment challenges with your Britax Marathon;
Difficulty Tightening the Harness
Is the harness stubbornly loose? Several factors can contribute to difficulty tightening the Britax ClickTight Marathon’s harness. First, ensure the harness straps aren’t twisted; this significantly reduces tightening effectiveness. Secondly, confirm the harness height is appropriately adjusted for your child’s size – an incorrect height can hinder proper tensioning.
If the issue persists, check for obstructions within the harness path, like clothing or padding. Sometimes, a thorough inspection reveals a minor snag. Also, verify the buckle is fully engaged; a partially open buckle prevents adequate tightening. Remember, a snug fit – where you cannot pinch any webbing at the shoulder – is crucial for safety.
If none of these solutions work, consult the full manual or contact Britax customer support for further assistance. A malfunctioning buckle or harness component might require professional attention.
ClickTight Mechanism Not Engaging
Experiencing trouble with the ClickTight installation? If the mechanism isn’t engaging, first ensure the vehicle seat belt is routed correctly through the ClickTight belt path – it must lie flat and without twists. Confirm the belt isn’t locked; a locked belt prevents the ClickTight system from properly compressing and securing the car seat.
Next, apply firm and even pressure to the ClickTight panel while simultaneously pushing the car seat into the vehicle seat. You should hear a distinct click as the mechanism engages. If it still doesn’t engage, try slightly adjusting the car seat’s position.
Remember, the ClickTight system requires a firm, deliberate action. If problems continue, review the installation guide’s illustrations or contact Britax support for personalized guidance.
Recline Adjustment Problems
Difficulty adjusting the recline angle? The Britax ClickTight Marathon offers multiple recline positions to accommodate children of different ages and sizes. Ensure the car seat isn’t occupied when adjusting the recline. Locate the recline adjuster – typically a handle or lever at the base of the car seat – and firmly operate it while simultaneously gently pushing or lifting the seat back.

If the adjuster feels stuck, check for obstructions like clothing or debris. A slight rocking motion can sometimes help dislodge any resistance. Always verify the recline indicator is aligned with the appropriate position for your child’s age and weight, as indicated in the manual.
Proper recline is crucial for safety and comfort. If issues persist, consult the detailed diagrams in the installation guide or reach out to Britax customer support.